This article aims at explaining the steps to link the LG TV with the esTV Controller placed in the Server Room of the Hotel.
Assuming that the esTV Controller is completely setup and all the network connections are in place, we will now understand the steps to be performed to install the TVs.
Linking the TV with the esTV Controller
We shall look into the very basics of the procedure, starting from powering on the TV. Let us take a look at the following steps in sequence:
- Power on the LG TV
- If you are installing the TV for the first time (Just unpacked the TV and powered it ON), then the Initial Setup screen will appear.
- If you want to use the already existing TV, then you will have to perform a Factory Reset first as per this procedure
Step - 1
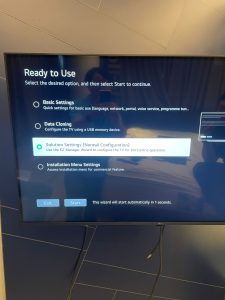
- Choose the "Solution Settings" on the screen titled "Ready to Use"
- Press Start
Step - 2
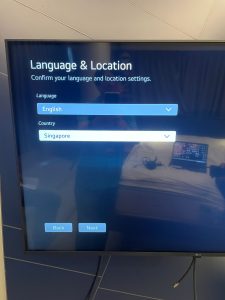
- Choose the Language of your choice and the Country in which you are setting up the TV
- Press Next
Step - 3
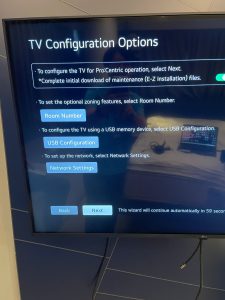
- Under TV Configuration Options, you need to Turn ON the toggle switch, that states "To configure the TV for Pro:Centric operation, select Next." as shown in the picture
- Press Next
Step - 4
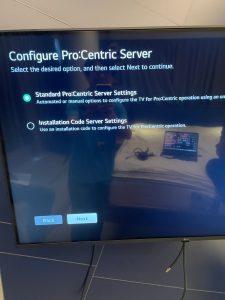
- Under "Configure Pro:Centric Server", choose Standard Pro:Centric Server Settings as shown in the picture
- Press Next
Step - 5
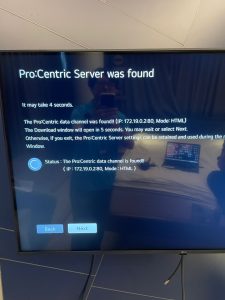
- Wait for the Pro:Centric Server to be discovered by the TV. It may take a while to appear.
- Once the TV finds the Pro:Centric Server on the Network, it will display its IP Address as shown in the picture.
- Confirm if the IP address of the Pro:Centric Server is correct before proceeding.
- Note: The Pro:Centric server is nothing but the esTV Controller. The Firewall / HSIA needs to have a broadcast entry for Pro:Centric server, only then the TVs would be able to discover the server on the Network.
Step - 6
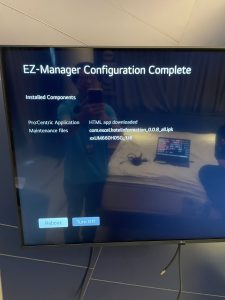
- If everything goes well, the TV will display the configuration complete success message.
- Press Reboot button shown on the TV Screen
Step - 7
- Wait for the TV to reboot, it will take a while for the esTV Launcher to appear first time after the Initial Setup.
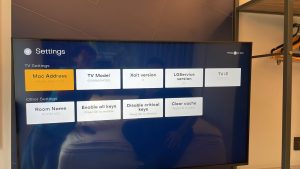
- Once the esTV Launcher is up on the Screen, press the secret key {hidden due to security reasons} on the TV Remote to access the esTV Settings Menu.
- On the Settings page, Navigate to Room Name under Other Settings and press OK / ENTER on the TV Remote.
- A popup will appear to enter the Room Number. Enter the Room Number in which this TV needs to be mounted and press OK / ENTER.
- Wait for the Success Message to appear.
- This confirms that your TV is registered with the esTV Controller and esTV Cloud. You can now Turn OFF the TV and proceed to configure other TVs.

